User Interface
8 min read
last updated: 03/04/2025
Overview
The look and feel of the application is similar to any classic Windows application. It has a main menu at the top, function icon groups that can be rearranged, main content area and a status bar at the bottom.
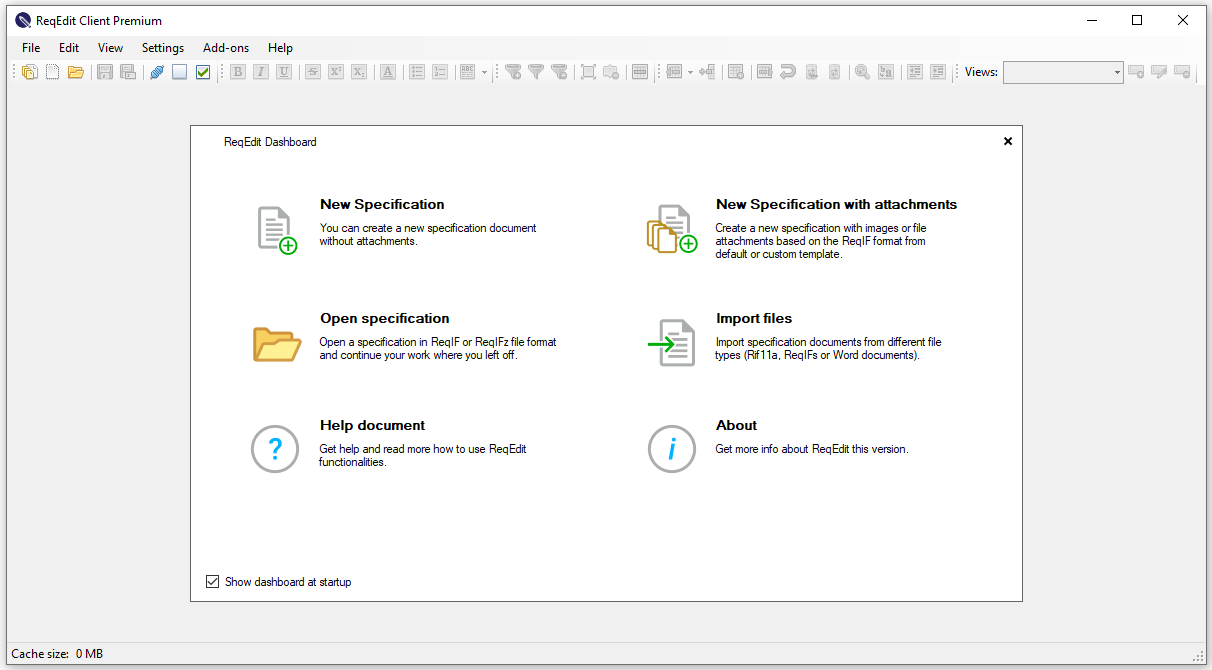
At first run a quick action dashboard is shown.
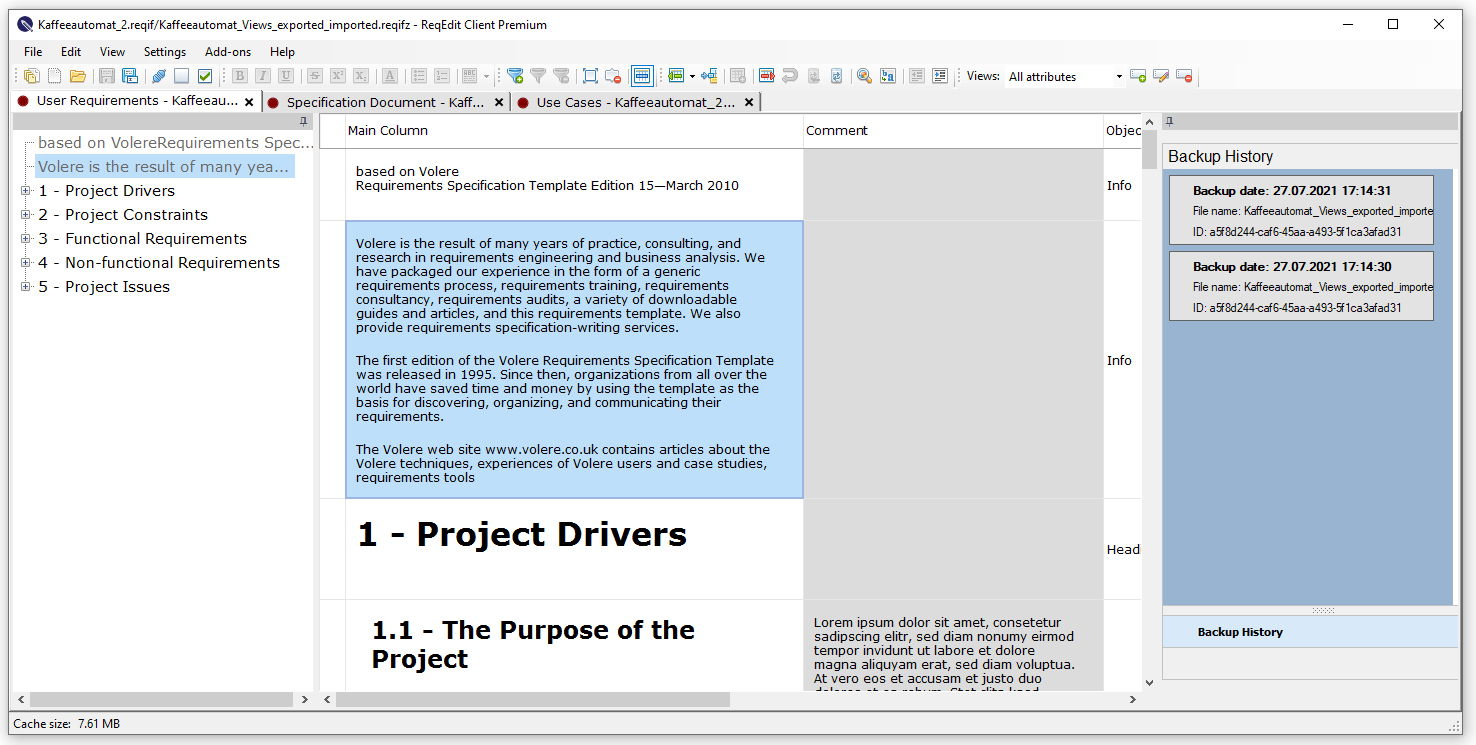
After opening a ReqIF file, the contents will be shown in the main user interface. If the ReqIF contains multiple specifications it will be displayed as color coded tabs.
Specification tabs
Opening a ReqIF file will display all the specifications as tabs. Same color tabs are from a single ReqIF or ReqIF Archive file. The specification title is displayed as the tab title.

Keeping the mouse over a tab will display more info of the specification like: file location, document id, and so on.
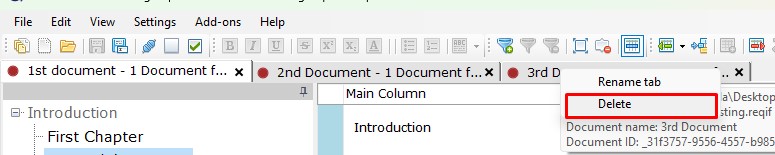
Rename/delete specifications
Right -click on the specification tab to rename or delete it.
Closing opened files
Close any tab by pressing the X of the tab or by pressing CTRL+W , if there are any unsaved changes a popup will ask to save the specification.
Closing all opened specifications of a ReqIF file by accessing File > Close All or by pressing CTRL+SHIFT+W, if there are any unsaved changes a popup will ask for confirmation.
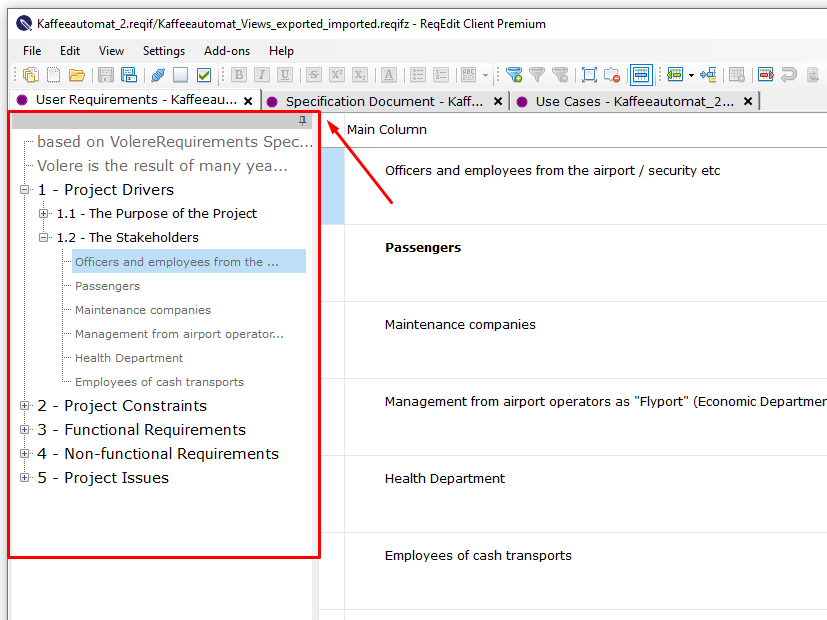
Navigator
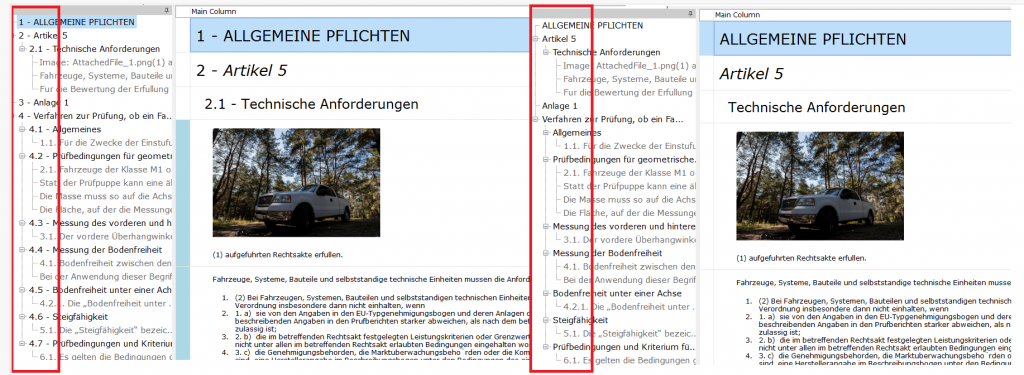
Specification headlines are shown as a tree menu on the left panel. Numbering is added automatically to aid navigation. Clicking on the items will jump to the same requirement in the content area.
Show / Hide Navigator
Navigator can be toggled by clicking the pin icon.

Requirement Numbering
Requirements with (ReqIF.ChapterName) headlines are shown in a tree menu structure, numbered by the position in the hierarchy. The numbering is automatically updated on each change of the requirements, new additions or deletions will affect this.
The levels of the menu represents sub items in the spec hierarchy. This is visible in the content as sub numbering of a main headline, all the content remains on a single level in the table.

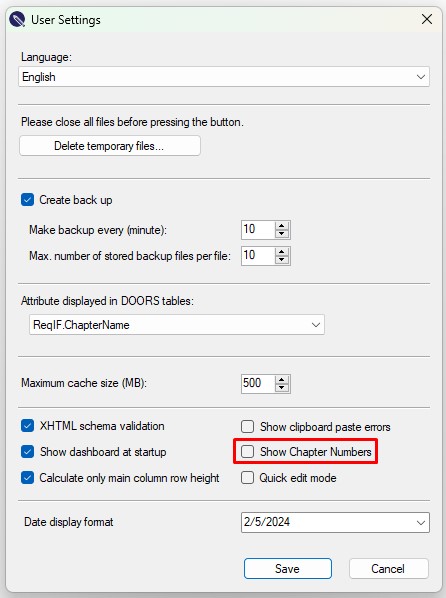
To show/hide Chapter Numbers check the box Show Chapter Numbers in the Settings/User settings.
Content
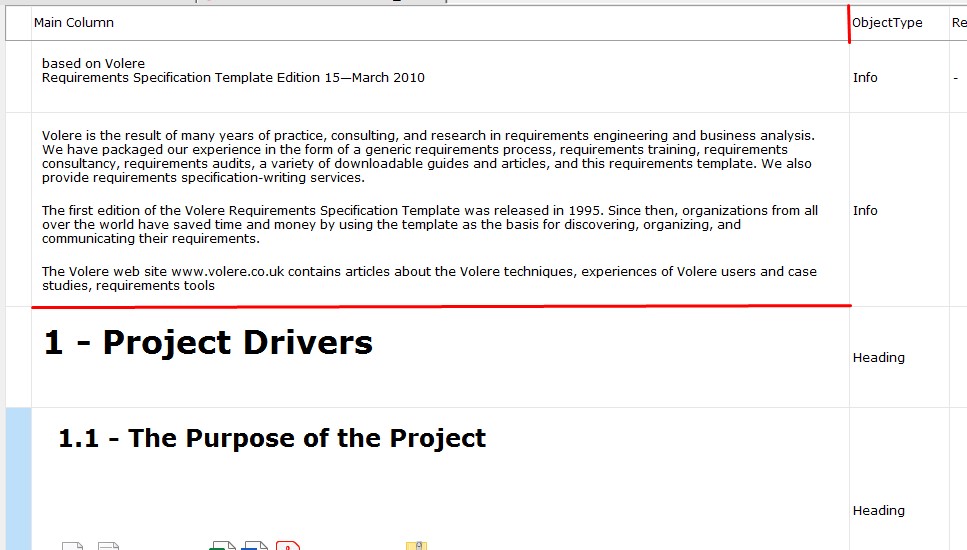
Requirements are shown in the middle as a table, where the Main Column is a multi content field and the other columns are the associated metadata.
The Object menu (Right-click)
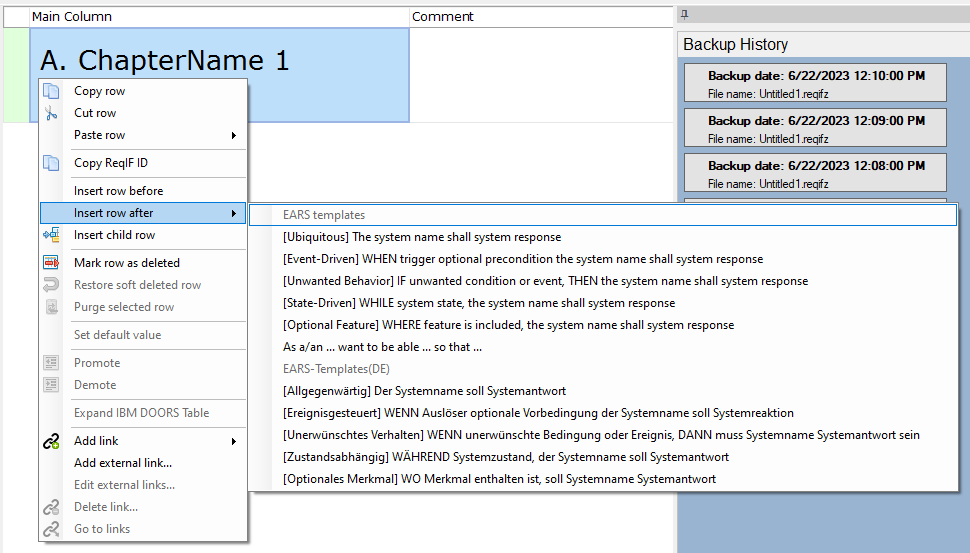
Right clicking any object (row) in the content area, displays the context menu. Contains editing functions like: creating, cut-copy-pasting, deleting, restoring, purging objects. Hierarchical editing si possible by promote / demote menu items.
Manage relations between objects by the lower menu items: Add, Edit, Delete link or Go to link targets.
Get the object ReqIF ID using the Copy ReqIF ID menu item.
Main Column
Main Column is the most important content of the specification. It has the default value of the combination of headline (ReqIF.ChapterName), description (ReqIF.Name), xhtml content (ReqIF.text). If all there attributes are present it will be displayed together in the same cell and the headline will have a number assigned to it.
The Main column content can be customized in the Document Settings panel. The attribute types supported are STRING or XHTML.
Resizing columns or rows
Drag the column header separator bars or the row separator bars to resize the grid.
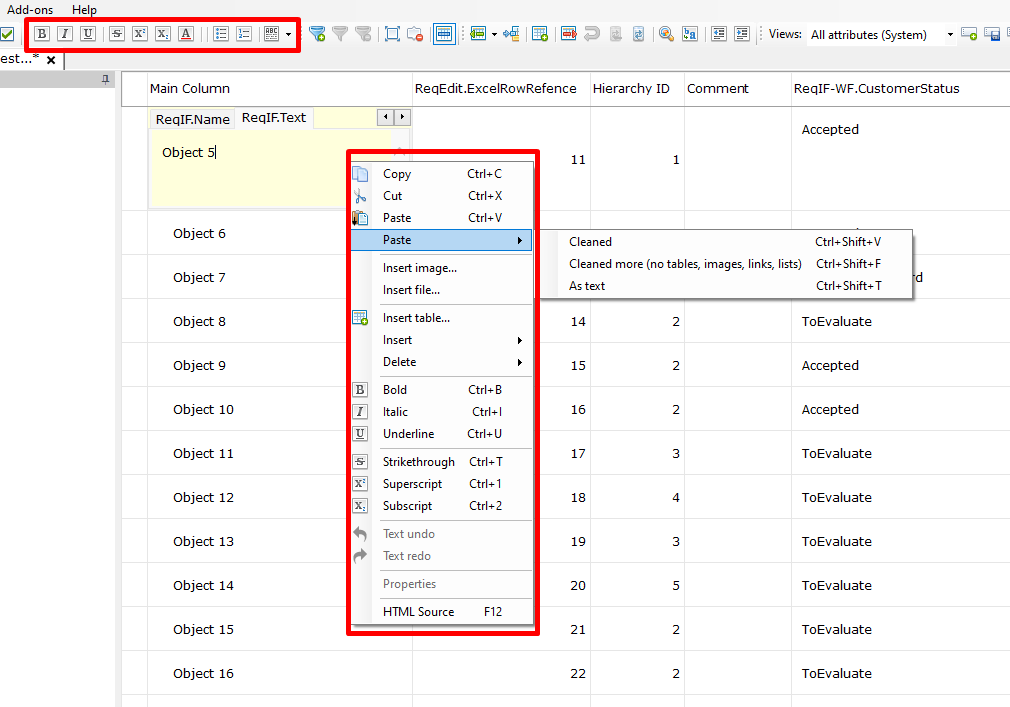
Content editing
Double clicking on any object will enable the inline editor and activate the text formatting icon group. Right clicking the content will show a menu for adding attachments or tables and formatting the content.
To leave the inline editing click anywhere outside the yellow background.
Managing columns
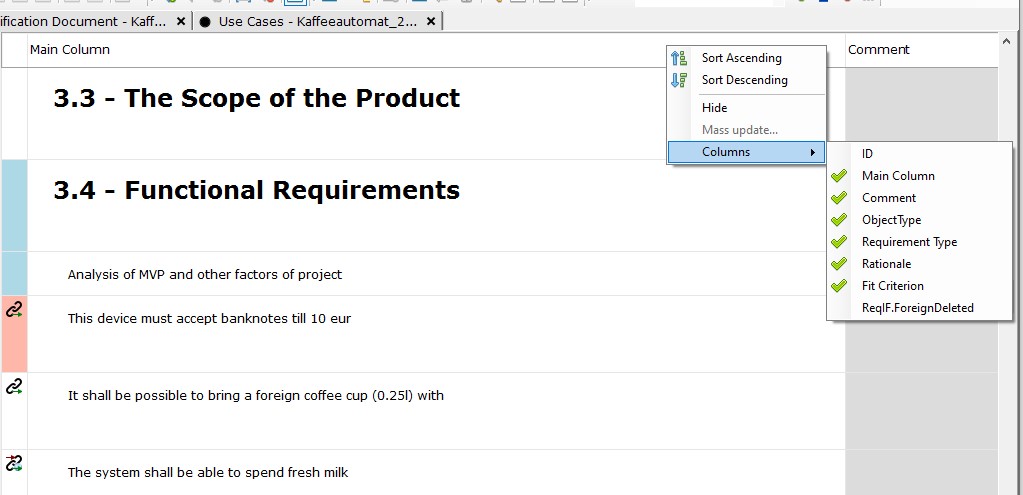
Right clicking the column headers will display a menu, where the selected column or the other columns can be toggled visible or hidden.
If all the columns are hidden the View manager can reset the visibility back to a predefined state.
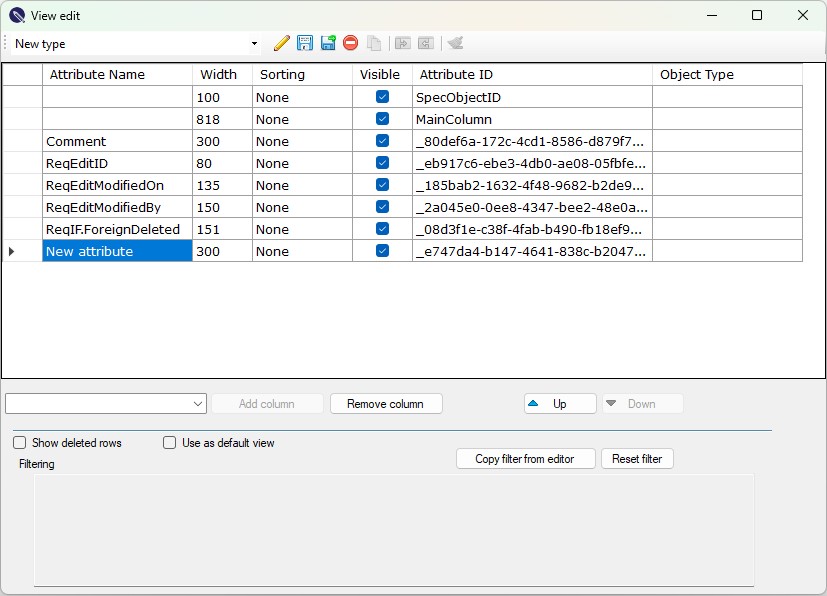
Views
Views are visible column sets with optional custom sorting and filtering saved as presets. The view manager is located in the icon groups on the right side. The views are only for displaying the ReqIF contents in a more human friendly manner for large files with lots of metadata.
The view presets are not stored in a ReqIF file, they can be exported and later imported from the local hard drive.
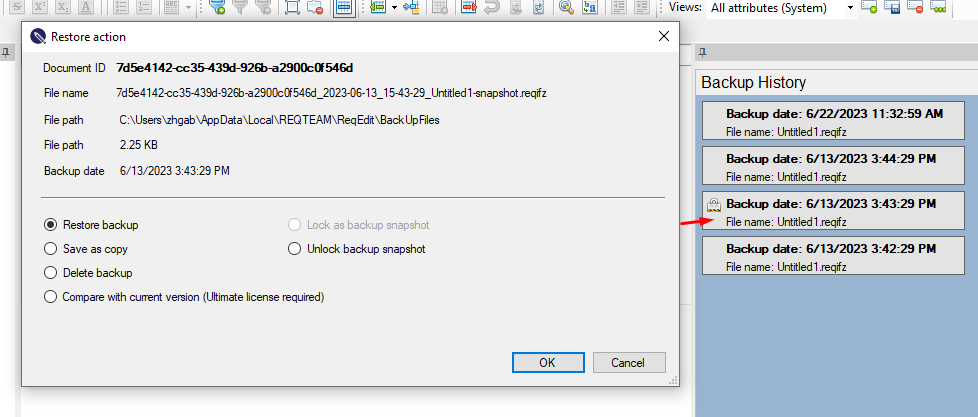
Backups
ReqEdit offers an auto-backup feature which will create a snapshot of the current state of the opened files. Default setting is to create a backup every 10 minutes and rotating 10 backup files (the last will be deleted to have a max of 10 backups).
The backup settings can be changed in the User Settings panel
Show / Hide Backups
Backups can be toggled by clicking the pin icon in the title of the panel

Backup Snapshots
Backups can be locked so that it will not be deleted automatically on backup rotation.
Menus
File
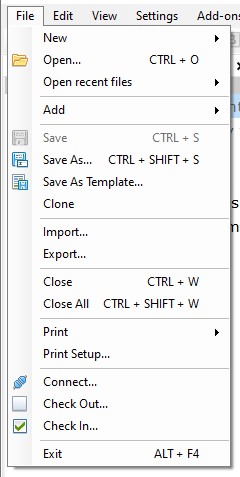
New
Create a new ReqIF file .reqif (New File) or an archive with attachments as .reqifz. (New Archive)
ReqIF Archive supports attaching external images or files to any requirement. Creating a new archive will show a window asking for a filename.
ReqIF (.reqif)
No attachments
CTRL+N
ReqIF Archive (.reqifz)
Can have attachments
CTRL+SHIFT+N
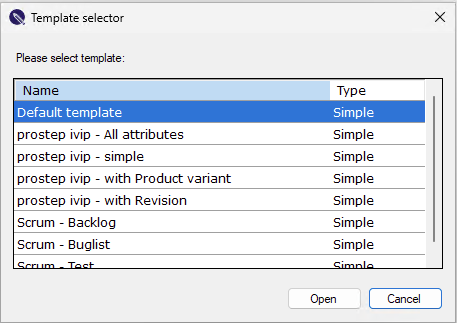
A template list will popup will ask for a specific template to use for the new file. For more information on templates, please read the Templates section.
Open
By default, only xml, rif, reqif, zip, reqifz and ReqEdit encrypted files can be selected

Add new document to current file
Adds a new specification document to the currently active ReqIF file. Use this to add more than one specification to a single file.
Save
Any change in the specifications will be displayed with asterisk * in the tab.
Changes to linked documents (e.g. Images or Word, Excel) will not be detected by the editor, a change needs to be made in the requirements in order to be able to Save
Save
Save the currently active file to disk
CTRL+S
Save As
Save the active file under a new name
Keep all UUIDs
CTRL+SHIFT+S
Save As for saving encrypted file
To encrypt a file choose ReqEdit Encrypted File (*reqenc, *.reqzip) as file type then click SAVE.

More about encryption of a file read here: ReqEdit File Encryption/Decryption
Save as template
Single document ReqIF files can be saved as a template and reused later
Close
Opened specifications can be hidden by clicking the X in the tab bar, if there are unsaved changes a popup will ask for confirmation. This is not removing the specification from the file.
Close All
Close all opened specifications, any unsaved change will notify the user. It will close all opened files.
Import
Start an import wizard for ReqIf 1.0.1 files
Export
Start an export wizard from ReqIF 1.0.1 to ReqIF compatibility mode or RIF 1.1 / RIF 1.1a arhive format.
Print the current specification Main Column or all visible columns.
Connect
Requires ReqEdit file server
Will authenticate the current user and create a connection
Check out
Requires ReqEdit file server
Lock the file and download for editing (other users that have permission to the same file cannot download it)
Check in
Requires ReqEdit file server
Upload a file to the server. If the file was previously locked by the user it will become unlocked and can be edited by others as well.
Edit
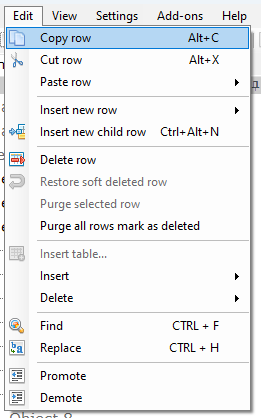
Editing objects and contents
Object / Requirement level editing
Create before, after
Create child
Promote, demote
Delete (soft delete)
Restore deleted (soft deleted)
Purge (hard delete)
Cut/Copy/Paste
Content level editing
Table editing
Find
Replace
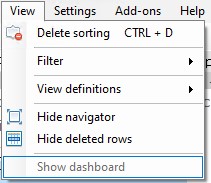
View
Attributes (columns) related
Filtering
ReqEdit can show a sub-set of the requirements based on special conditions of the attributes. Filters can be set and reset. Filters will not be saved inside ReqIF files.
Sorting
ReqEdit can sort the requirements based on multiple columns. It can be configured and then reset. The sorting is not saved inside the ReqIF file.
Show/Hide deleted requirement objects
Soft deleted objects will be marked for deletion but are not removed from a specification until PURGE is not pressed. The deleted objects can be shown or hidden
View definitions (views)
Views are a sub-set of the attributes that are displayed. The views are not saved inside the ReqIF. file Views can be exported and later imported.
The views can be imported and used on any specification as long as there are attributes with similar names.
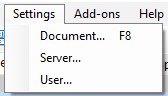
Settings
Expert users can fine tune ReqEdit for their specific use case, and configure lots of ReqIF settings
Document settings
Manage ReqIF file internal settings
Attribute Types
Attributes
Document attributes
Links
Configure Main Column display settings
Server settings
ReqEdit file server connection settings
Server user credentials
User settings
ReqEdit internal configuration
Interface language
Auto backup settings
Doors table display settings
Cache size
Dashboard startup
Date display format
XHTML Schema validation
Chapter Numbers showing
Add-ons
Displays all available add-ons which are active in the current license. Descriptions below.
Help
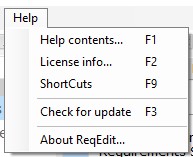
Contains a user guide. Can display Information about the active license. Display keyboard shortcuts. Check for online updates. Display version information about the current ReqEdit release.
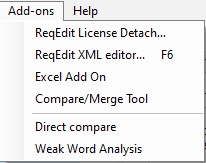
Add-ons
ReqEdit Ultimate comes with powerful addons that extends the base functionality.
Xml Editor
Look inside ReqIF files and check the xml code. The editor comes with a built in ReqIF validation function that will debug any invalid code. Read more here.
Excel importer
Turn your excel files into ReqIF files. Data exchange is more realiable and lossless if ReqIF is used. Read more here.
Compare / Merge tool
Will generate a comparison report that can be handed out as a signle html file. Read more here.
Weak-word Analysis
Weak words are words that are confusing for readers and should be avoided if possible. This tool provides a case insensitive whole word search for this purpose, optionally writing the results back in the ReqIF file. Read more here.
License Detach tool
Take ReqEdit out of the licensing environment. This power feature will enable users not to depend on the local licensing servers and to be able to work from anywhere. Read more here.
Expert knowledge
Tab title configuration
ReqEdit exposes some settings that can be configured for the tabs. The configuration file is located in AppData\Local\REQTEAM\ReqEdit\ReqEditSettings.xml
| Setting | Values | Notes |
| TabDocumentTextAlign | Left, Right | Alignment of document title in the tab |
| TabDocumentWidth | 250px | width of the tabs in pixels |
Keyboard shortcuts
| Ctrl+O | Open file |
| Ctrl+N | New file |
| Ctrl+S | Save file |
| Ctrl+Shift+S | Save as |
| Ctrl+W | Close file |
| Ctrl+Shift+W | Close all file |
| Alt+F4 | Close application |
| Ctrl+D | Delete Sorting |
| Ctrl+F | Find text |
| Ctrl+H | Replace text |
| Ctrl+E | Add new or edit filter |
| Ctrl+A | Deactivate filter |
| Ctrl+Q | Delete filter |
| Alt+N | Add new object below |
| Alt+Shift+N | Add new child object |
| Ctrl+Tab | Switch between open tabs |
| Ctrl+C | Copy text information inside the cell |
| Ctrl+X | Cut text information inside the cell |
| Ctrl+V | Paste text (remove all formatings) |
| Ctrl+Alt+S | Start link |
| Ctrl+Alt+E | End link |
| Ctrl+Alt+R | Reset start link |
| Ctrl+Alt+R | Reset start link |
| F1 | Open help |
| F2 | Open selected cell in edit mode |
| F3 | Check for update |
| F5 | License information |
| F6 | XML Editor |
| F8 | Document settings |
| F9 | Shortcut window |