Edit ReqIF requirement files
8 min read
last updated: 06/27/2023
Why ReqIF files?
Requirement Interchange Format is the de facto standard for lossless requirement data exchange for any industry.
ReqIF simplifies the workflow of requirements exchange between suppliers and vendors in all industries. Mainly driven by the automotive industry.
ReqEdit was built from the ground up to aid the participants of the supply-chain to quickly use ReqIF files without the need for complex ALM/PLM software solutions. This is becoming more important with the digital transformation in more and more industries.
ReqIF based interchange offers seamless integration of supply chains in all industries making collaboration more standardized and efficient.
ReqEdit is an easy tool for ReqIF editing. Creating, comparing and merging requirements and specification documents with powerfull add-ons.
Large companies rely on lossless data exchange
ReqIF format simplifies and streamlines the data exchange of requirements between companies or departments and also on the management level. ReqEdit has multiple licensing models to support corporate environments and use cases.
Medium or small size companies needs cost effective solutions to participate in the supply-chain
ReqEdit is available as a standalone application. No other dependency is required. Cost effective solution for processing ReqIF requirement files.
ReqIF file structure
ReqEdit follows ReqIF standard on all levels. It will display contents of ReqIF files from structural to attribute definitions. More details you can find here.
ReqIF format
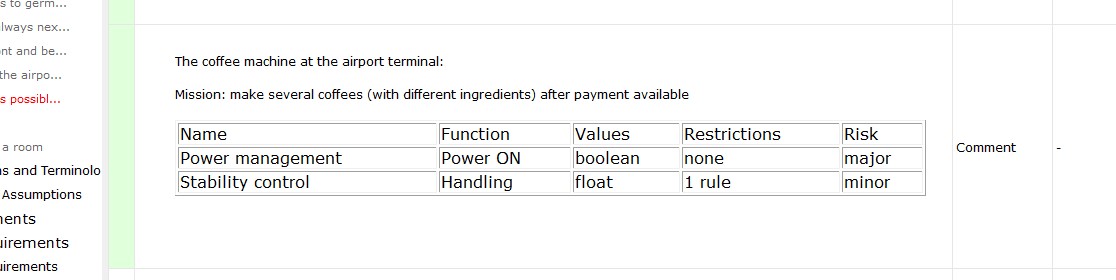
Attribute Types
atomic data types: boolean, date, enumeration, int, float, string, xhtml
Attributes
uses the basic attribute type definitions with optional restrictions: min, max, length, can be defined for objects and specifications also
Object types
collection of attribute types that are grouped together
Objects
uses a specific object type and has values for each attribute
Values
value objects for attributes of objects or specifications
Specification Types
a collection of object types and specification attributes
Specifications
uses a single specification type
Hierarchy
requirement object structure inside a specification
Relations
links between the objects
Edit Objects
Double click on a cell to edit the content. An inline editor appears for XHTML attributes. For other data types appear corresponding checkboxes or date pickers or single inputs.
To close inline editing click on any other cell.
The user can set the height of the main column: check the box in Settings / User … / Calculate only main column row height.
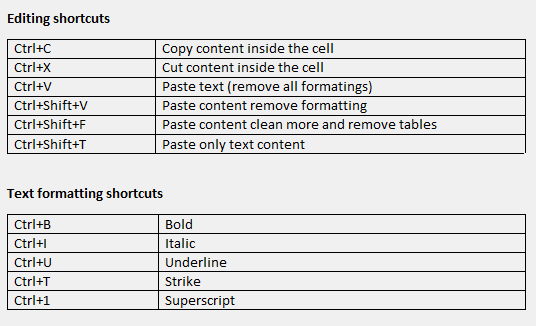
Use the quick action icons or the right-click menu for text formatting and XHTML content editing.
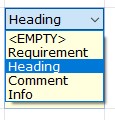
Single valued enumeration will show a dropdown selector
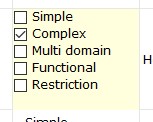
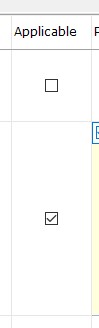
Multivalued enumeration attributes are displayed as a list of checkboxes
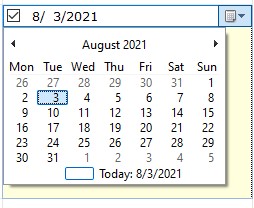
Dates will show a datepicker
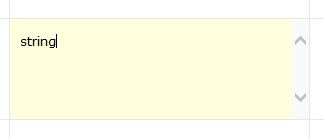
String types editing as simple text
Boolean values editing as checkboxes
Integer and float types will only store numerical values
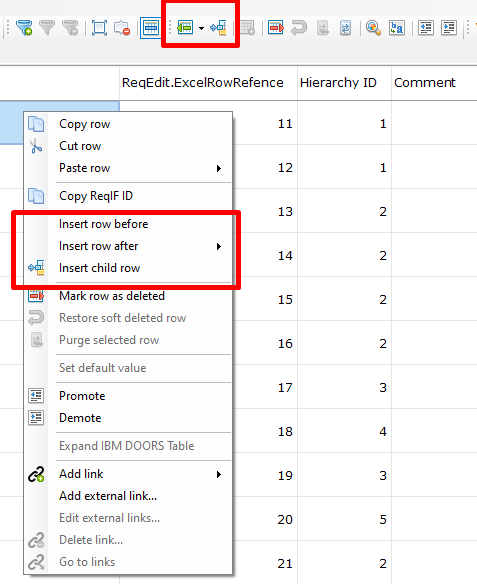
Insert rows
New rows can be created on the same level or as children to the current row.
For inserting a new row at the same level of the current row, right-click on a cell and choose where to insert it. A new generic object is displayed as an empty line or with default values.
Each spec object in ReqEdit has the same attributes (columns) in a document. Different object types are not supported in a single document.
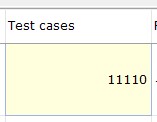
Insert child row creates a new row in the table, below the selected line. It is a child in the tree hierarchy. A new empty line will appear. In case it is edited it will look like this:
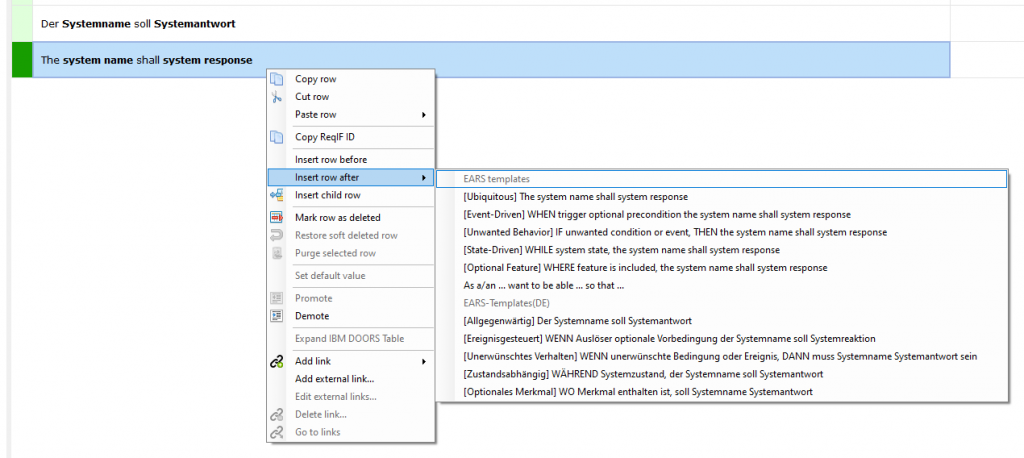
There is a possibility to insert rows based on customizable requirement patterns. To offer a quicker way to build requirement documents.
Use Insert row after.. and chose one of the patterns.
Delete rows
ReqEdit uses soft-deletions, delete will not remove objects from the ReqIF file.
Delete the selected row(s) by
- selecting the row(s) and pressing DEL or
- right-click menu or
- the quick action icons.
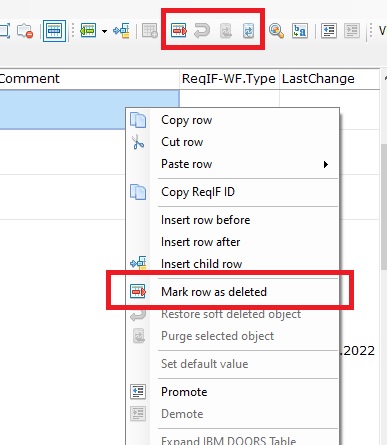
To confirm Delete action click Yes in the pop up window which appears next.
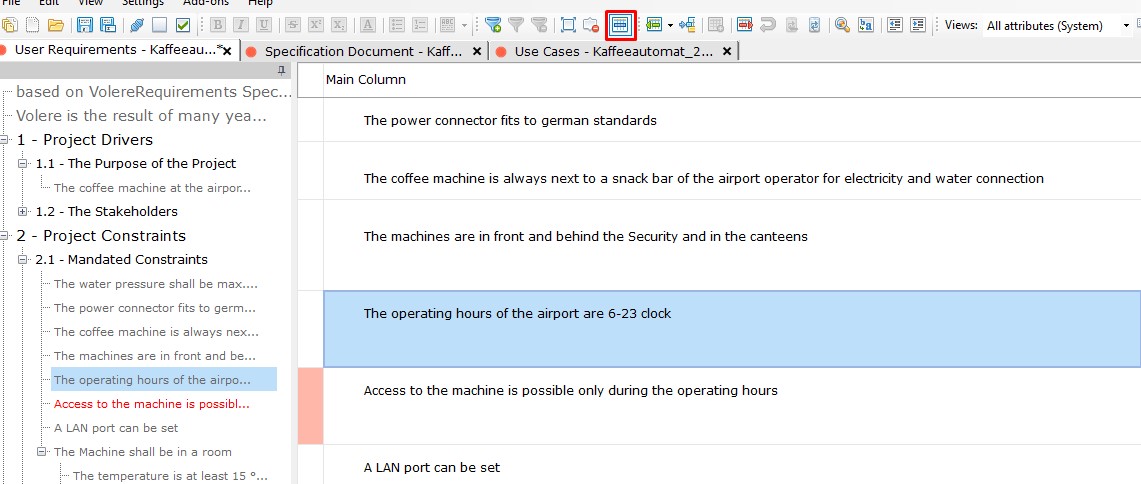
This function places the removed row(s) into a deleted state. (marked with red)
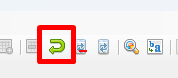
Restoring deleted rows
To restore a deleted row(s) select it/them and click on the „Restore deleted rows” button from the toolbar or right-click on the object and select the Restore menu item. It is possible to restore multiple deleted rows.
PURGE (definitive deletion) of deleted objects
Use PURGE to remove objects, marked as deleted, with all attachments from a ReqIF file. Purge function is on the delete toolbars and right-click menus.
Once purged, objects cannot be recovered. Auto-backup feature will have 10 snapshots for recovery.
To clean up deleted rows:
- purge a single deleted row or
- purge all the deleted rows in the entire specification document.

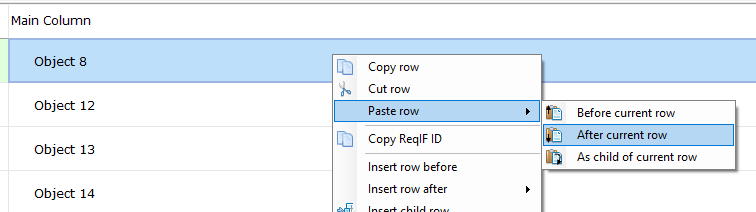
Copy and move rows
Use cut-copy-paste of existing row to create new one. Right-click the desired location and paste the copied object before / after or as a child row of another row.
If a copied row contains links, on paste, a notification asks what to do with the existing links.
If the row has child elements, these will also be copied or moved.
To copy-paste multiple rows at a time select multiple rows and right-click on the last selected row, click Copy row than click on the first selected row and click Paste.
Copy-paste in the Navigator
Use right-click menu in the object navigator to copy-paste objects/rows.
If an object contains links to or from other objects, the links are copied too. A pop up window asks for copying the links or not.
Note: In Navigator is possible to copy-paste only one row at a time.
Navigator drag-and-drop
Use drag-and-drop to move objects
Object can be created by CTRL+Drag and release at the desired location
Editing Hierarchy
To change the hierarchy of objects use the promote and demote functions. They are in the quick action icons, and in right-click context menus.
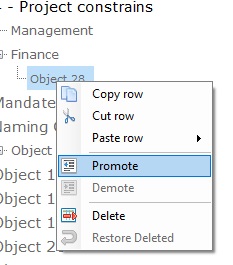
Promoting
Will move the object one level up in the hierarchy. If using the drag-and-drop way for promoting, an object/ row can be moved more levels up or down.
It is possible to Promote/Demote multiple rows of the same levels by selecting rows with shift and arrows than click Promote/Demote.
Demoting
Move the object one level down as children in the hierarchy.
Promote or demote a parent object include promote or demote the object together with its child objects.
Main column
Main column is a combined cell displaying the most important ReqIF attributes: ReqIF.ChapterName, ReqIF.Name, ReqIF.Text
In this cell, the main fields of the document can be edited at once. These fields are XHTML type attributes.
Double click the main column of an object displays an inline XHML editor with 3 tabs. One tab for each attribute.
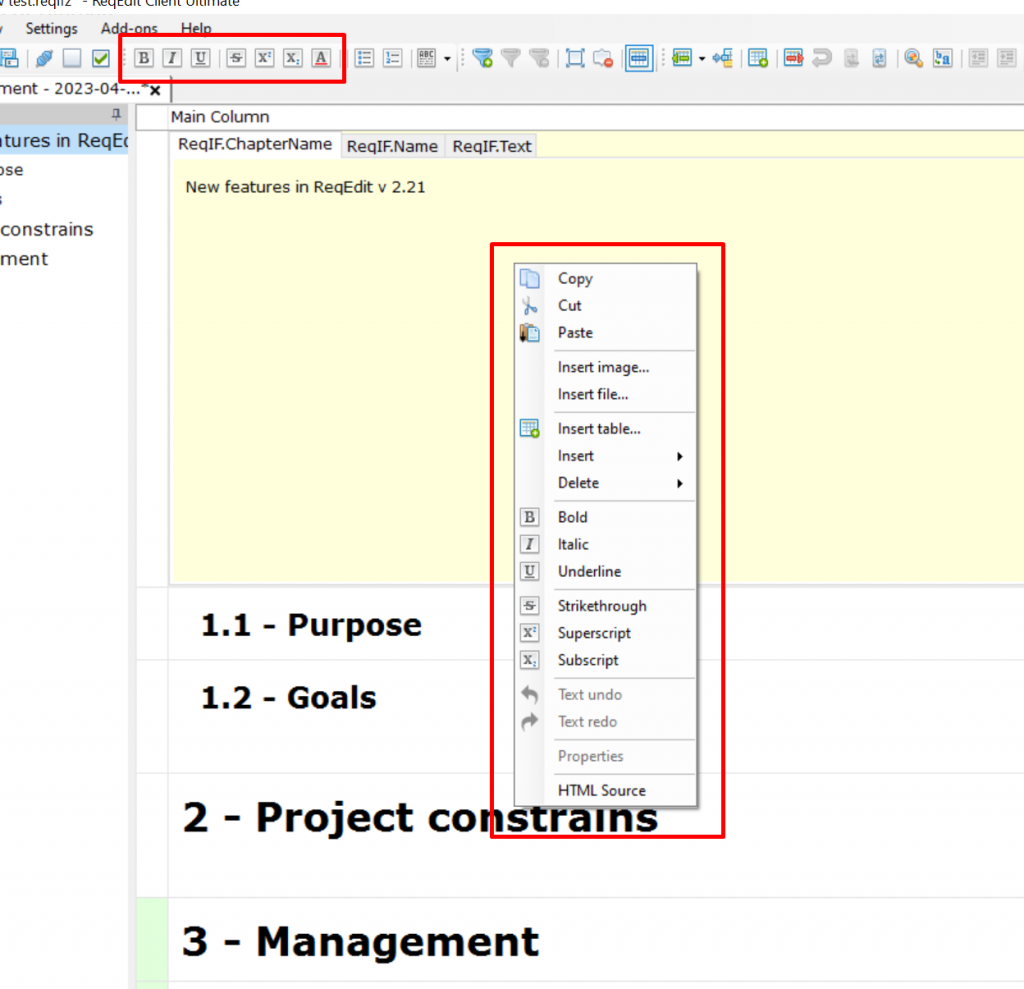
The cell content editing menu Copy/Cut/Paste function refers to copy/cut/paste texts and pictures from the same document and external documents, too. (word file, excel spreadsheet cells, screenshots, images). The function converts external data format into ReqIF supported one. (text formatting doesn’t see, image cannot be downloaded). File format must be ReqIFz to be able to save the images, as attachments.
Note: Depending on corporate internet access, downloading copied images could be prevented by firewalls. ReqEdit will remove some formatting due to limitations of XHTML inside of the ReqIF format.
Copy-Cut-Paste the text of cells of the same ReqIFz file has no limitations regarding the possibilities shown in the right click menu. (Bold, underline, italic, strikethrough, subscript, superscript)
Copy-Cut-Paste of tables is with visible borders of cells. ReqEdit will add automatically borders to tables, even there was no set one before.
Note for experts with HTML knowledge: The HTML Source (experimental) menu item allows to edit and change the HTML source code of content of a cell.
Limitations on content editing Copy-Cut-Paste function:
- Cell formatting settings in Excel spreadsheet
- Attached objects from Wordpad (RTF documents)
- Images can be copy-paste only in ReqIFz files
- If the image/attachment cannot be copied, only file name of the preview images are displayed.
Recommendation: Before copy-cut content from an external source, save file to have a backup copy in case of the copied content is ReqIF invalid.
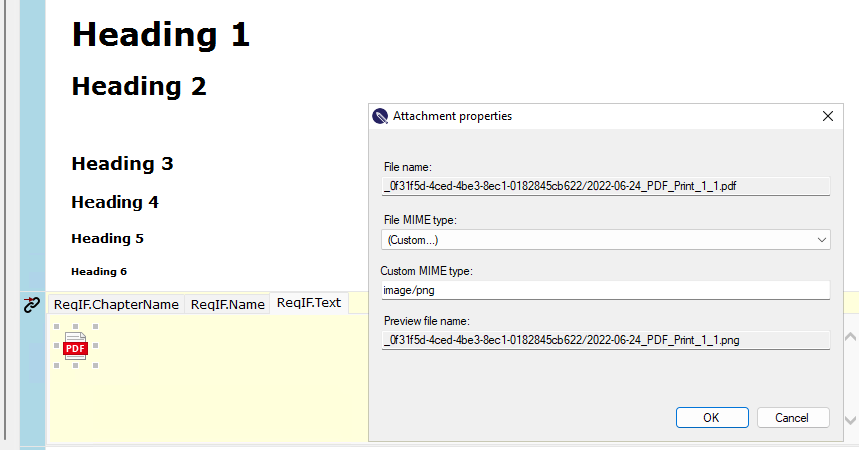
Properties
Properties menu gives information about the attachments / inserted files in main column cells. Right click on the inserted file, Properties
HTML Source (experimental)
This function of the right click menu of content editor is recommended to expert users. This function allows to view and change the html source code of the attribute/cell.
Note: Currently the changes will not be validated at inserting time. So be very careful at any change!
Columns
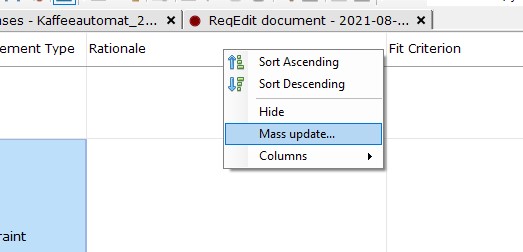
Mass update of attributes
Update multiple rows with a specific attribute value.
The mass update function is designed to be used together with the filtering. This way, a set of objects can be selected according to specific criteria and updated at the same time.
The mass update function is not available for the main column
To use Mass update function first define a filter to select all the rows you want to change. Then right-click on the column header. Select Mass update….A popup window appears.
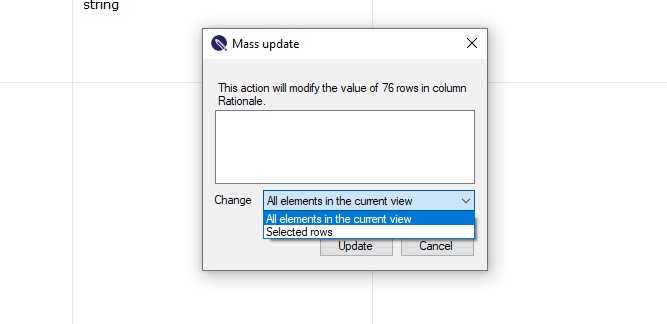
Mass update changes all values in the current view for the column.
To change individual cells, select multiple cells from the same column (either Ctrl + click or Shift + click). Right-click at the column heading to trigger the mass change.
Default values
Each attribute can have a default value defined in the Document settings. Selecting an attribute and access the “Attribute editor”.
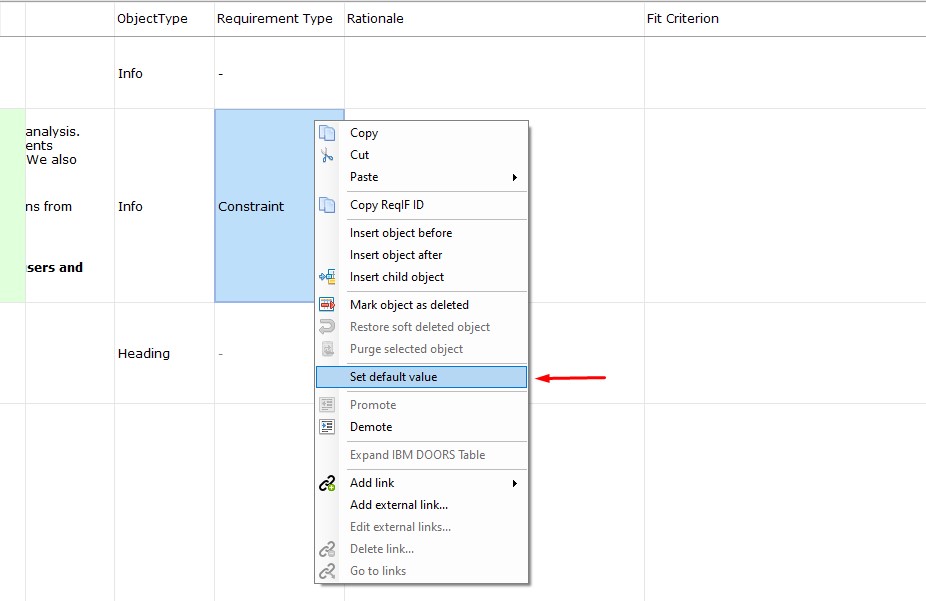
To set back a cells default value for each attribute of a row, right-click the corresponding cell and select the “Set default value”.
Attachments
ReqIF Archive .reqifz files supports file attachments for objects.
Only XHTML attributes can have attachments inside .reqifz files
Image attachments:
png, bmp, jpg, gif, ico, wmf,
File attachments:
any file type is supported
pdf, doc, docx, xls, xlsx …
Opening file attachments
Double-click on the file’s icon. The attached file is opened by the installed applications on the machine.
Insert file attachments
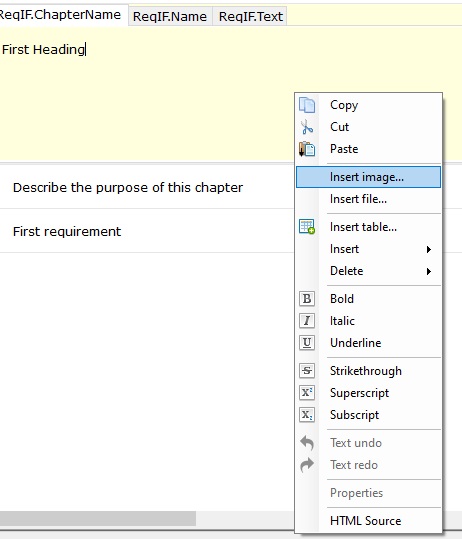
To add an attachment right-click the XHTML inline editor area and select Insert image or Insert file

Tables
XHTML attributes by definition can have tables. All tables are rendered inside cells.
To edit XHTML table structure use the inline editor right-click menu.
Save ReqIF files
If your file is a multi-document file, saving one of the documents will also save the changes made in the other documents of the ReqIF file.
NOTE: Changes on linked documents (e.g. Images or Word, Excel) are not detected. Make a content change to trigger update and enable saving.
Save as
Save the currently edited file as a new filename. Contents will be identical to the original one. Can convert ReqIF into ReqIFz.
Note: Actual file is closed and the file in new saved format will be opened.
Save as encrypted file
To encrypt a file choose ReqEdit Encrypted File (*reqenc, *.reqzip) as file type then click SAVE.
More about encryption of a file read here: ReqEdit File Encryption/Decryption
Close files
ReqEdit can only close saved files. If there are any unsaved changes, a notification displays and asks to save files before closing.
Use CLOSE ALL to clean up the editor.